You cannot debug a cluster you do not have.
Every post in this series ("Mastering Kubernetes the Right Way") assumes you can run kubectl apply -f issue.yaml, watch something break, and run kubectl apply -f fix.yaml to put it back. That assumption falls apart on the very first day if you do not already have a cluster — and "spin up a Kubernetes cluster" is the kind of task that has eaten entire afternoons of mine.
This is Day 0. By the end of this post you will have a working, real, cloud-managed Kubernetes cluster on AWS, GCP, or Azure. One command. Real Terraform underneath. No magic.
What we are building
One script. Three clouds. Same cluster.
Every post in this runbook needs a real cluster. The create-cluster.sh script bootstraps one on AWS EKS, GCP GKE, or Azure AKS — same Terraform modules underneath, same kubectl on top. Pick the cloud that fits your setup today.
One command, three clouds
./create-cluster.sh --cloud aws (or gcp / azure) calls real Terraform modules from vellankikoti/resources-creator. One flag decides which cloud you land on. Switch later by running the same command with a different flag — the kubectl side never changes.
Managed control plane, real networking
Each target lands a full stack: a VPC (or VNet), public and private subnets, a NAT for egress, a managed node group, and a cloud-managed control plane. You don't run etcd yourself. You don't babysit the API server. You bring the workload.
Every scenario works identically on all three
After kubeconfig is written, the cloud is invisible. Every kubectl command, every YAML manifest, and every fix in the runbook behaves the same way on EKS, GKE, and AKS — the only differences are at the IAM / identity boundary during creation.
A managed Kubernetes cluster — your choice of AWS EKS, GCP GKE, or Azure AKS. Each one comes with:
- Network: a VPC (or VNet), public + private subnets, NAT gateways
- Control plane: managed by the cloud provider, you do not babysit it
- Worker nodes: a managed node group sized for
dev - kubeconfig: written to your laptop so
kubectlJust Works - Tear-down: one command, leaves nothing behind, leaves no bill behind
The whole thing comes from one repo: vellankikoti/resources-creator. Terraform modules per cloud, a thin shell wrapper, and one script that hides all of it behind a flag.
Prerequisites (15 minutes, once)
You need four command-line tools — Terraform, kubectl, Helm, and the CLI for your cloud (one of AWS / Google Cloud / Azure) — plus a logged-in cloud account. Pick your operating system:


Verify everything is alive
Once installed, run these on every OS — same commands, same expected output:
terraform version          # should print v1.10.x or newer
kubectl version --client   # should print Client Version: v1.31.x or newer
helm version               # should print v3.16.x or newer

# And ONE of these depending on your cloud:
aws sts get-caller-identity        # AWS — should print your account ID
gcloud config get-value project    # GCP — should print your project ID
az account show # Azure — should print your subscriptionIf any of those fail, fix them now. Spending two hours debugging a broken kubectl because your AWS CLI was the wrong version is the most demoralizing way to start a Kubernetes journey.
Common setup issues (the ones that actually waste your morning)
These are the failures I see beginners hit again and again. Worth scanning even if your install looked clean.
1. terraform: command not found after a fresh install.
The binary installed but your shell does not see it because the PATH change has not been reloaded. Fix: open a new terminal window. On Linux/Windows, you can also source ~/.bashrc or refreshenv. If it still fails, run which terraform (or where terraform on Windows) — if it returns nothing, the install put the binary somewhere unexpected.
2. aws sts get-caller-identity returns "Unable to locate credentials".
You installed the CLI but never ran aws configure, OR you have an AWS profile mismatch. Either run aws configure to set the default profile, or set export AWS_PROFILE=<your-profile> in your shell. SSO users need aws sso login instead.
3. kubectl shows "Unable to connect to the server: x509: certificate signed by unknown authority".
Your kubeconfig is pointing at a stale or mismatched cluster. Check kubectl config current-context and switch with kubectl config use-context <name>. After running create-cluster.sh later in this post, the script writes a fresh context and selects it automatically — so this error is almost always from a leftover context.
4. gcloud auth login works but Terraform says "could not find default credentials".
There are TWO gcloud auth flows. gcloud auth login authenticates the CLI for gcloud commands. Terraform needs gcloud auth application-default login for its provider. Run that second command and Terraform will find the credentials.
5. az login opens a browser tab that never returns.
Common in headless Linux/WSL2. Use az login --use-device-code instead — it gives you a code to paste into a browser on any device.
6. WSL2 cannot reach the cloud (timeouts on aws/gcloud/az).
Usually a corporate VPN that does not propagate routes into WSL2. Workaround: configure WSL2 networking mirrored mode in ~/.wslconfig with networkingMode=mirrored and restart WSL (wsl --shutdown).
7. helm: command not found even though install succeeded.
On macOS Apple Silicon, this happens when Homebrew installed Helm in /opt/homebrew/bin but your shell is still using the old Intel /usr/local/bin path. Fix: add eval "$(/opt/homebrew/bin/brew shellenv)" to your ~/.zshrc and reload.
8. Terraform errors out with "Error: Failed to install provider" on a corporate network.
Your firewall is blocking releases.hashicorp.com. Either get the proxy whitelisted, or set TF_REGISTRY_DISCOVERY_RETRY=5 and try a network at home first.
Clone the cluster factory
git clone https://github.com/vellankikoti/resources-creator.git
cd resources-creator/cluster-creatorInside, you will find:
cluster-creator/
├── scripts/create-cluster.sh   # The one command
├── terraform/
│   ├── eks/                    # AWS EKS module
│   ├── gke/                    # GCP GKE module
│   ├── aks/                    # Azure AKS module
│   └── modules/                # Shared building blocks
├── environments/
│   ├── dev.env
│   ├── qa.env
│   ├── staging.env
│   └── prod.env
└── addons/                     # Optional cluster addons
The Terraform per cloud is the real config. The script just wires it up so you do not have to think about state files, backend configuration, or the order of terraform init / plan / apply.
One command. Pick your cloud.
AWS (EKS)
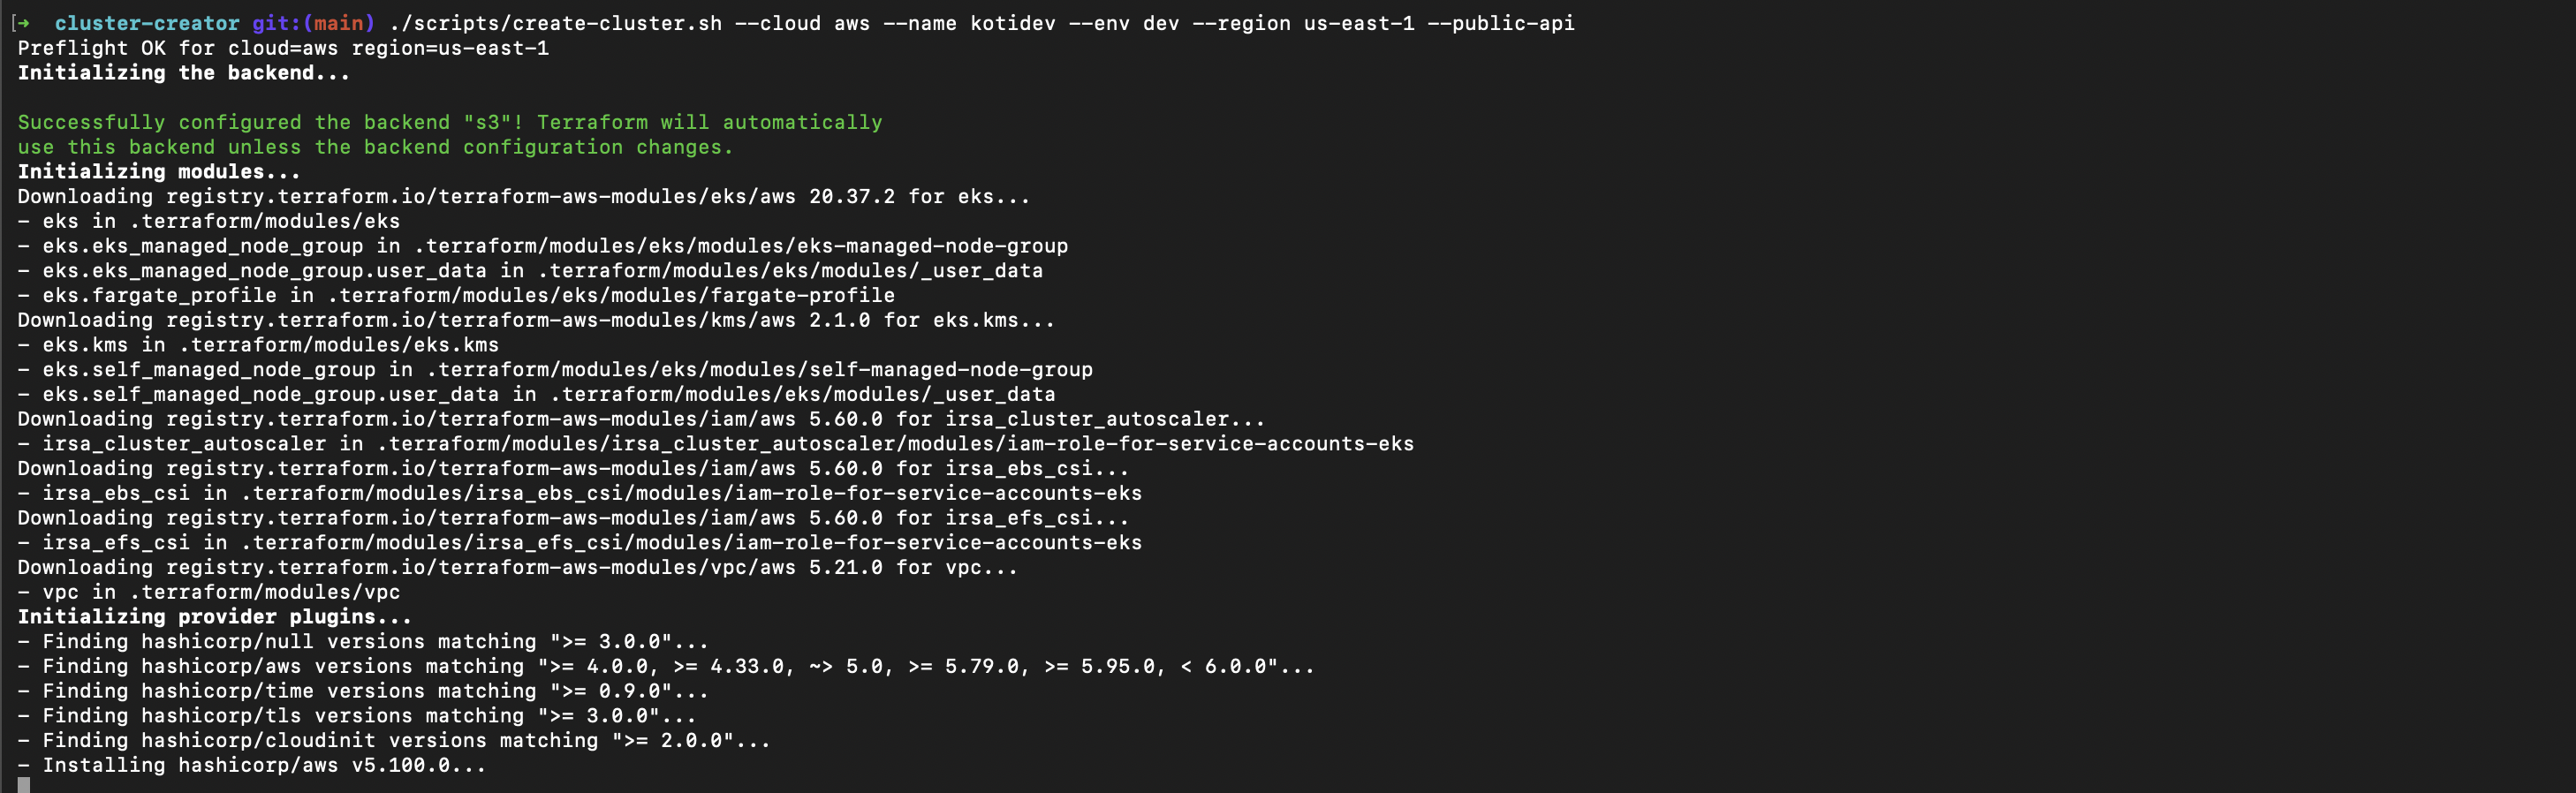
./scripts/create-cluster.sh \
  --cloud aws \
  --name kotidev \
  --env dev \
--region us-east-1What this creates: VPC, 3 private + 3 public subnets, one NAT gateway (single for non-prod, multi-NAT for prod), an EKS managed control plane, and a managed node group. Cost target for dev: under $5/day if you tear it down at end of day.
GCP (GKE)
./scripts/create-cluster.sh \
  --cloud gcp \
  --name kotidev \
  --env dev \
--region us-central1What this creates: VPC, regional subnet, GKE cluster (standard mode, not autopilot — we want to see what's happening), a default node pool. Same cost shape as EKS.
Azure (AKS)
./scripts/create-cluster.sh \
  --cloud azure \
  --name kotidev \
  --env dev \
--region eastusWhat this creates: Resource group, VNet, subnet, AKS cluster with Azure CNI, default system node pool. Same cost shape as the others.
What happens when you run it
The script does roughly this:
- Validates your cloud CLI is logged in and the region is real.
- Initializes Terraform with the correct backend and module path for your cloud.
- Plans the resource graph and prints what it is about to create.
- Applies the plan (asks for confirmation in
dev, auto-confirms inqa). - Writes kubeconfig to
~/.kube/configsokubectlis immediately wired up. - Validates the cluster by running
kubectl get nodesand waiting for them to beReady.
The whole thing takes 8–14 minutes depending on the cloud. AWS is the slowest because EKS control plane provisioning is genuinely glacial. GKE is the fastest. AKS sits in between.
Verify
kubectl get nodes
# NAME                STATUS   ROLES    AGE   VERSION
# ip-10-0-1-23.ec2    Ready    <none>   2m    v1.30.4
# ip-10-0-2-44.ec2    Ready    <none>   2m    v1.30.4

kubectl get pods -A
# Should show kube-system pods running cleanly.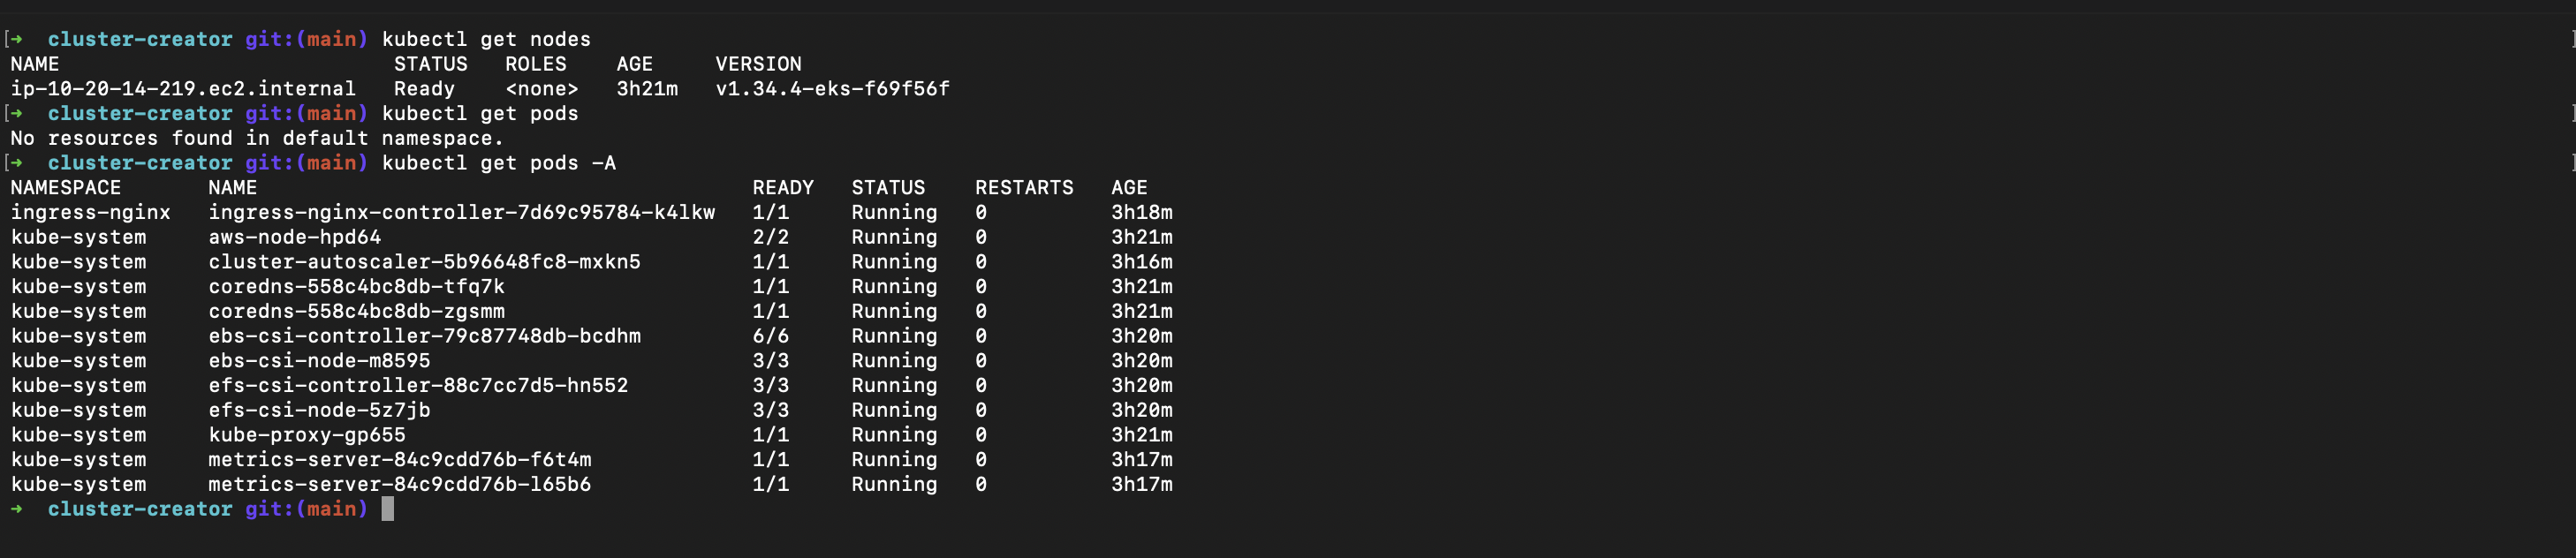
If the nodes are NotReady, give it 60 seconds. If they are still NotReady, run kubectl describe node <name> and look at the Conditions block. The story is usually right there.
Tear it down before bed
./scripts/destroy-cluster.sh \
  --cloud aws \
  --name kotidev \
  --env dev \
--region us-east-1This is the most important command in the whole post. Always run it before you stop working for the day. A forgotten EKS cluster running over the weekend is a $50 bill nobody enjoys.
What you have now
A real, cloud-managed Kubernetes cluster, provisioned by real Terraform, that you can throw away and recreate in under fifteen minutes. From here, the rest of the series (Days 1 through 35) assumes this cluster exists. Every post starts with kubectl apply -f issue.yaml, and every fix lands cleanly because the cluster is real.
Day 1 lands tomorrow: the simplest possible failure mode, and the one I see most often in beginner clusters — a pod that refuses to start because the command is wrong.
See you on Day 1.